
How to Remove Doorbell Chime Cover: Step-by-Step Guide
Posted by graues on 10.04.26
How to Remove a Doorbell Chime Cover Safely (Step-by-Step Guide)
If your doorbell has stopped sounding quite right, or you just want to clean the dust out of an old unit, the first thing you'll need to do is remove the doorbell chime cover. For most people, this is unfamiliar territory — and it can feel uncertain if you've never done it before. The good news: it's a simple DIY task that almost anyone can handle safely with a few basic tools and one important habit: turning off the power first.

This guide walks through the whole process clearly and carefully — from identifying your cover type to cleaning the interior, reattaching everything correctly, and knowing when a job is better left to a professional.
Key Takeaways
- Always turn off power at the circuit breaker before touching the chime cover — no exceptions.
- There are three common cover types: screw-on, snap-on, and slide-off. Each removes differently.
- You only need a few basic tools: a screwdriver, flashlight, and possibly a step ladder.
- After removing the cover, inspect and clean the interior before reattaching.
- If you encounter damaged wiring or persistent issues after reassembly, call a licensed electrician.
Understanding Your Doorbell Chime Cover
Before you reach for a screwdriver, take a moment to look at what you're actually dealing with. Doorbell chime covers — also called doorbell cover boxes or chime box covers — come in three main attachment styles, and each one requires a slightly different approach to remove without causing damage.
Screw-on covers are the most straightforward. You'll see visible screw heads at the corners or along the sides of the cover. These are almost always Phillips or flathead screws.
Snap-on covers have no visible screws. Instead, they're held in place by small plastic tabs or clips that lock into the chime box frame. These need a little more care — the tabs can break if you force them.
Slide-off covers are the simplest of all. They sit in a channel or groove and slide in one direction — usually upward or sideways — to come free.
Take a close look at your chime box before doing anything. Use a flashlight if needed. Look for screw heads, feel along the edges for tabs or clips, and check for any directional arrows or guidance printed on the cover. If you have access to the original manual or can find the model number on the unit, that information is worth having before you begin.
Tools and Safety Precautions
You don't need much for this job. Gather everything before you start so the process goes smoothly from beginning to end.
What you'll need:
- Phillips and flathead screwdrivers
- A flashlight or phone torch
- A step ladder if the chime is mounted high
- A soft dry cloth for cleaning
- A small bowl or container for screws
- A non-contact voltage tester (optional but recommended)
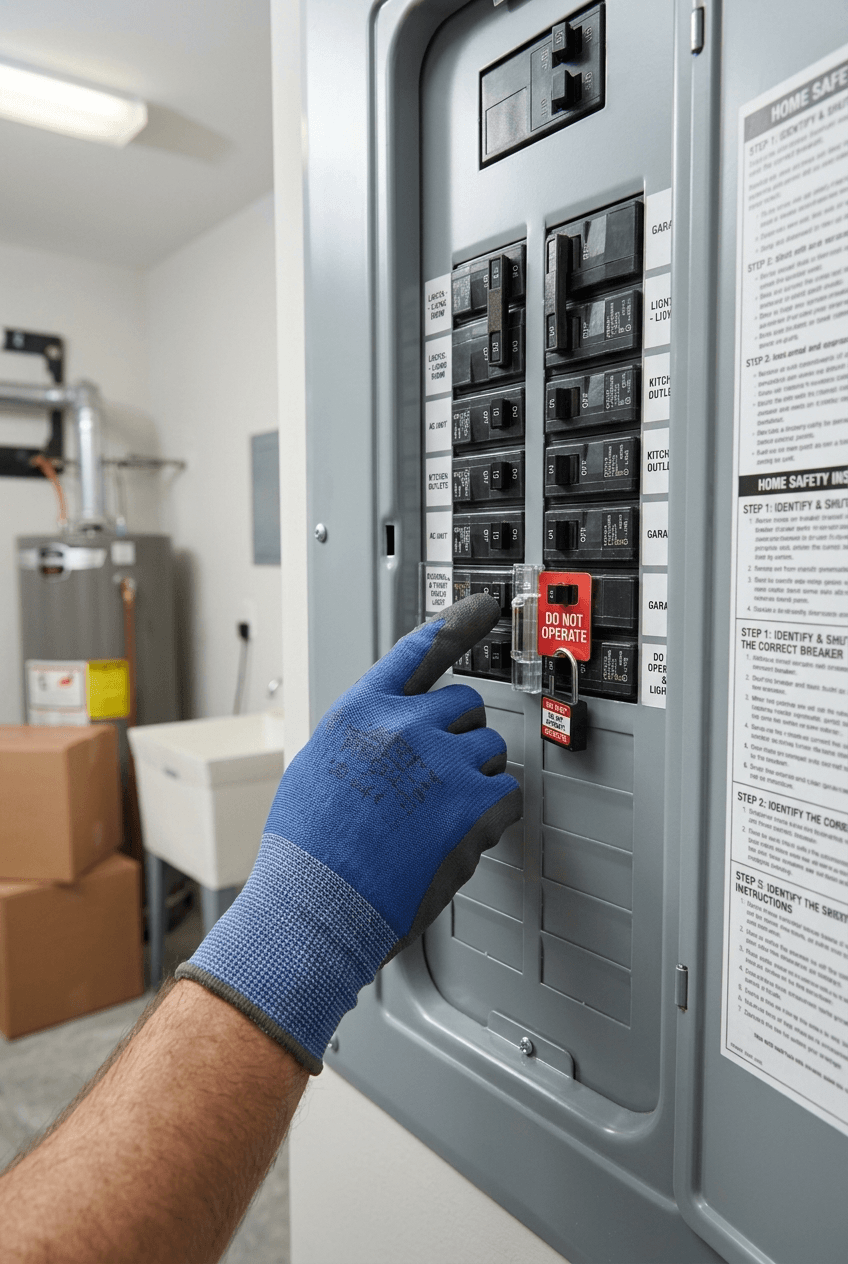
Safety comes first. Doorbell systems typically run on low-voltage power, but that doesn't mean you should skip the precautions. Always turn off the power at your circuit breaker before removing the cover. Look for the switch labeled "doorbell" — if none are labeled, you can test by having someone press the button while you flip switches, or use a voltage tester to confirm power is off once you locate the chime.
Make sure your tools are in good working condition before you begin. A stripped screwdriver or a cracked flathead can damage the cover or the chime housing. For general reference on working safely around home electrical components, the U.S. Consumer Product Safety Commission provides reliable home electrical safety guidance that's worth a quick read before any household electrical work.
Step-by-Step Removal Process
Step 1 — Turn Off the Power
Go to your home's circuit breaker panel — usually located in a utility room, basement, hallway, or garage. Find the switch that controls the doorbell circuit and flip it to the off position. If your panel isn't labeled clearly, use a non-contact voltage tester near the chime box to confirm there's no live current before proceeding.
Don't skip this step. Even low-voltage doorbell systems carry enough current to cause a shock or damage the unit if disturbed while live.
Step 2 — Locate and Inspect the Chime Cover
Your doorbell chime box is typically mounted on a wall or ceiling near the main entrance, often in a hallway or entry area. If you're not sure where it is, ring the doorbell from outside (the power to the bell button is separate from the chime's internal components) and follow the sound.
Once you find it, take a moment to look it over carefully. Look for screw heads, clip tabs, or slide grooves. Note any wear, cracks, or discoloration. If the cover looks like it's been painted over, score gently around the edges with a utility knife before attempting removal — this prevents paint from tearing away from the wall.
Removing Different Types of Doorbell Chime Covers
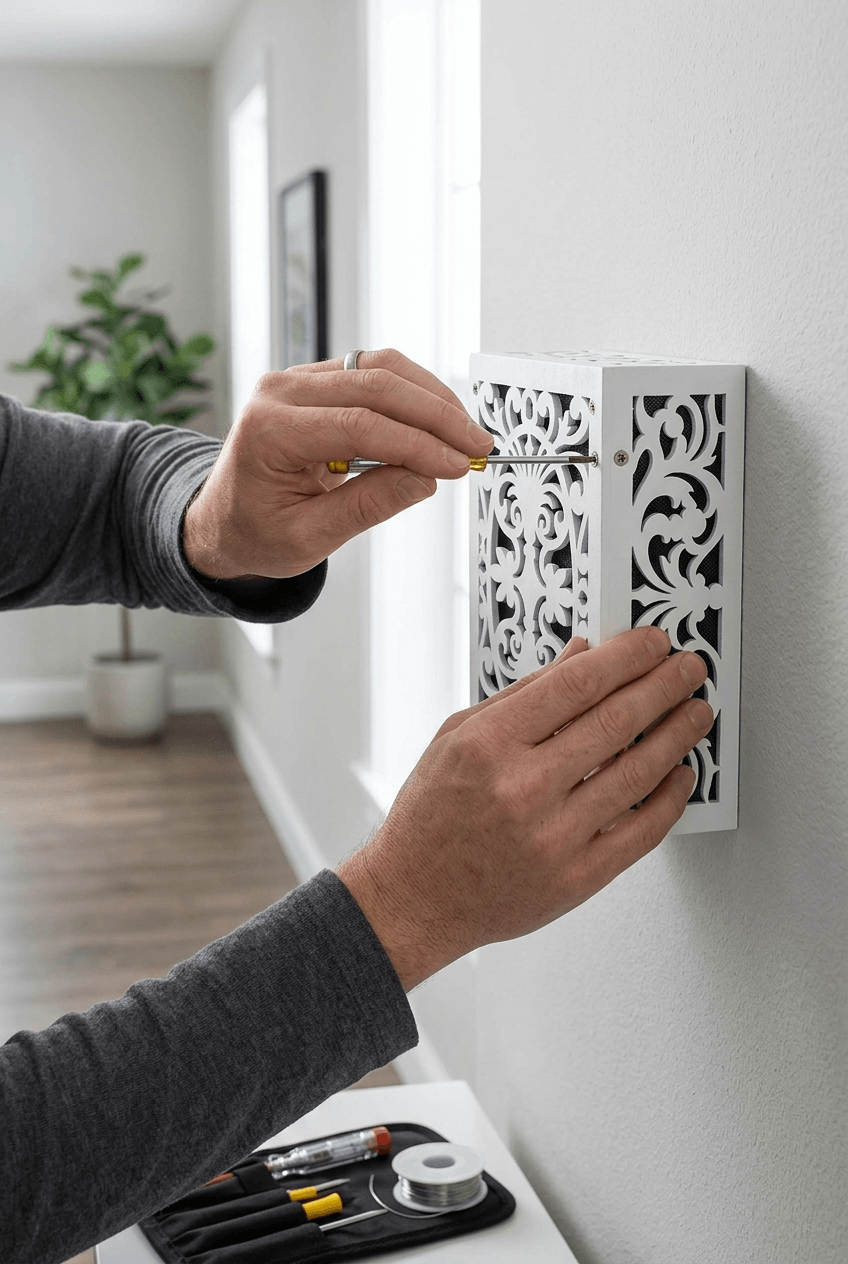
Screw-On Covers
Select the right screwdriver — Phillips for cross-head screws, flathead for slotted ones. Unscrew each fastener carefully and place them immediately into a small bowl or container so they don't roll away. As the last screw comes out, support the cover with your other hand so it doesn't fall and crack.
Once all screws are removed, gently pull the cover straight out from the chime box. It should come free easily. If it feels sticky, it may be lightly glued or painted on — apply very gentle, even pressure around the edges rather than pulling from one side.
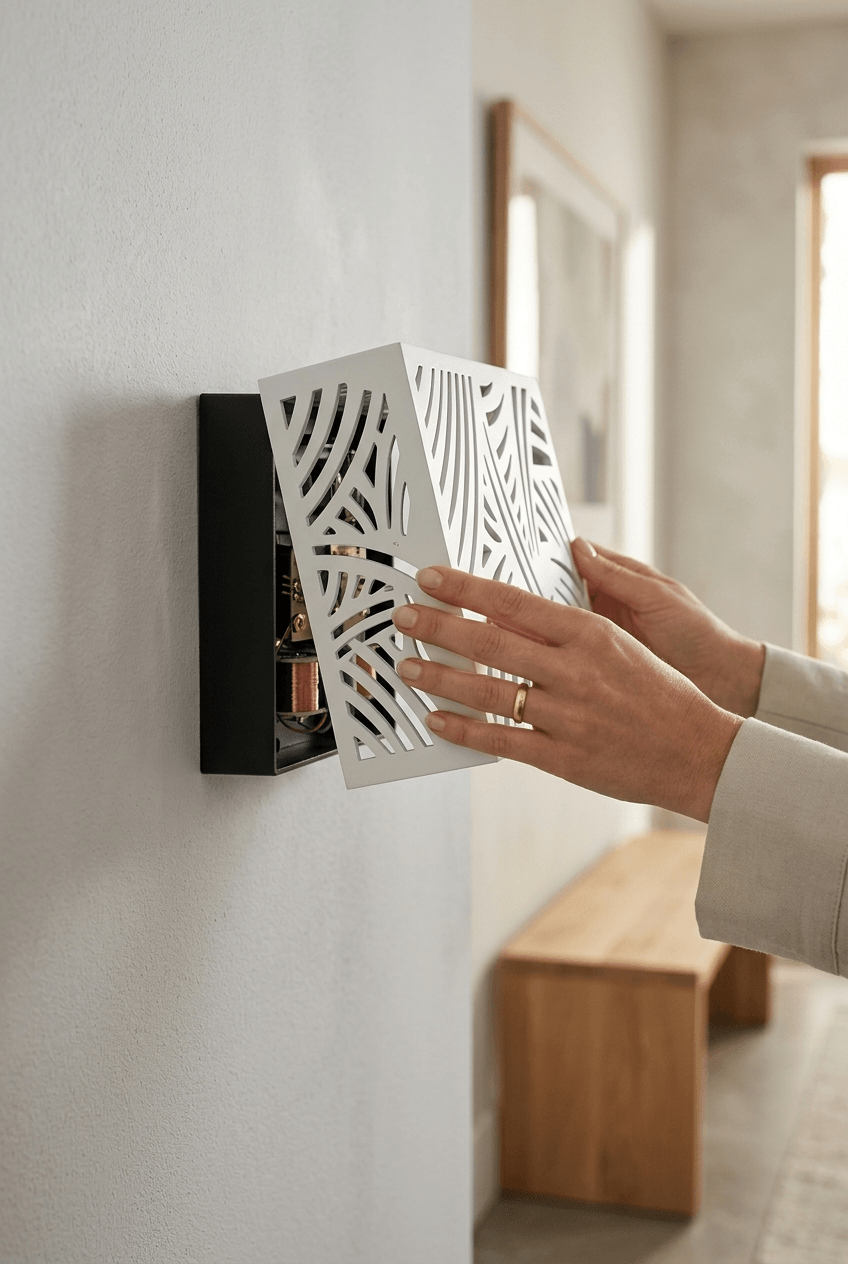
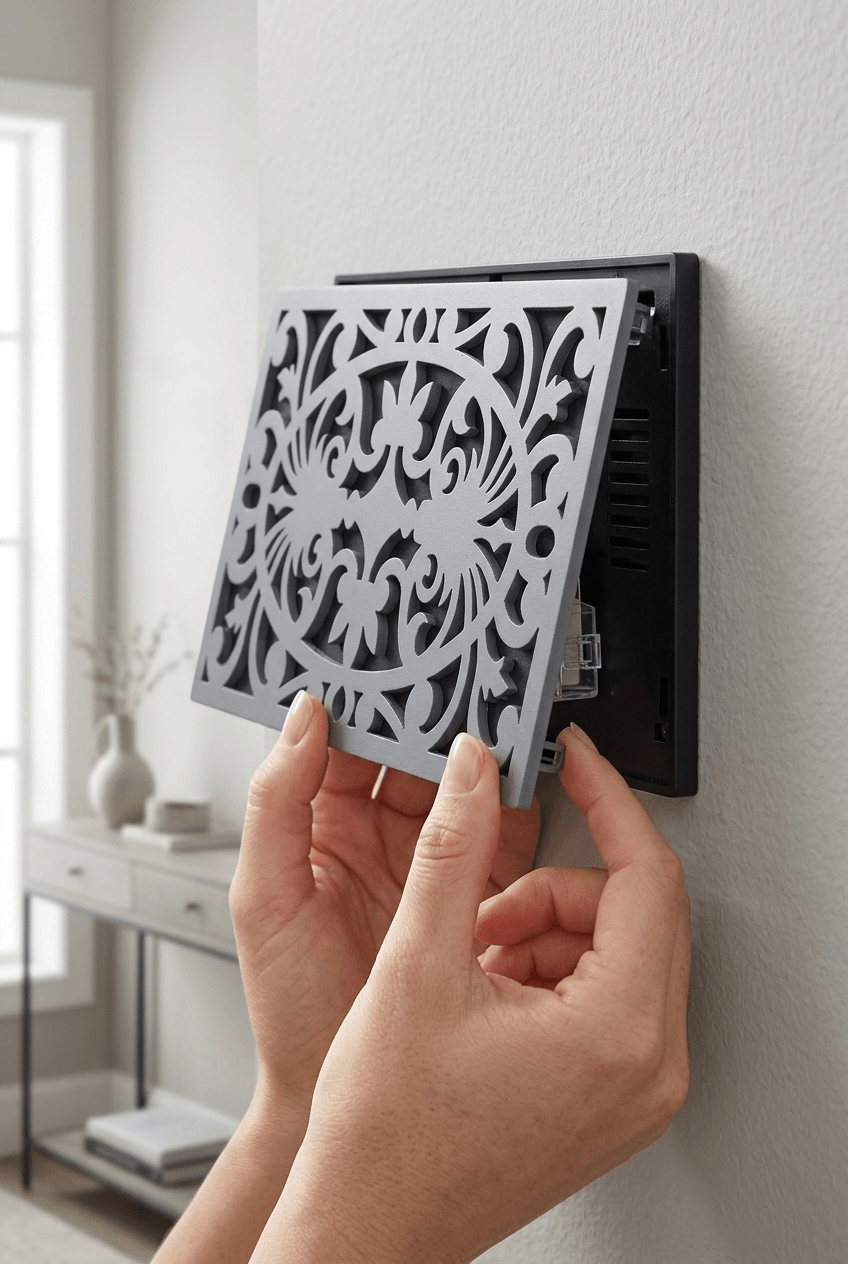
Snap-On Covers
Look for small tabs or clips around the edges or at the corners. Use your fingers to press or flex these tabs inward while gently pulling the cover away from the wall. Start at one corner and work around the cover rather than trying to release all tabs at once.
If the tabs are stiff, you can use a flathead screwdriver wrapped in a thin cloth to avoid scratching — insert it gently at the tab location and apply light leverage. Slow and steady pressure is the key here. Forcing the cover can snap the tabs, making reattachment difficult or impossible.
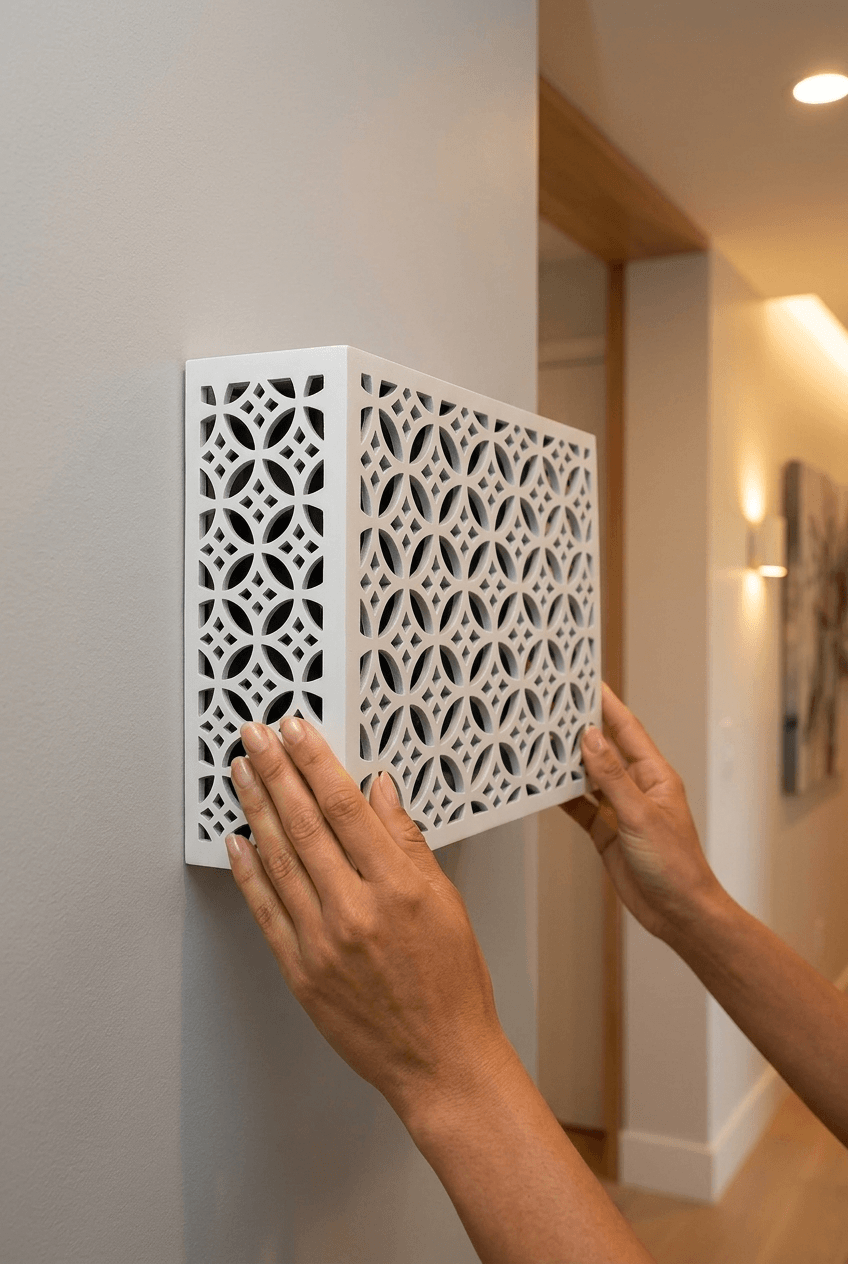
Slide-Off Covers
Slide-off covers move in one direction — usually upward, but sometimes sideways. Look for a small arrow, groove, or channel that indicates the correct direction. Apply gentle, even pressure with both hands and guide the cover along the track.
If it doesn't move easily, don't force it. Double-check the direction — sliding the wrong way can jam the cover or crack the housing. Once you have the right direction, it should glide off smoothly with minimal effort.
Cleaning and Inspection After Removal
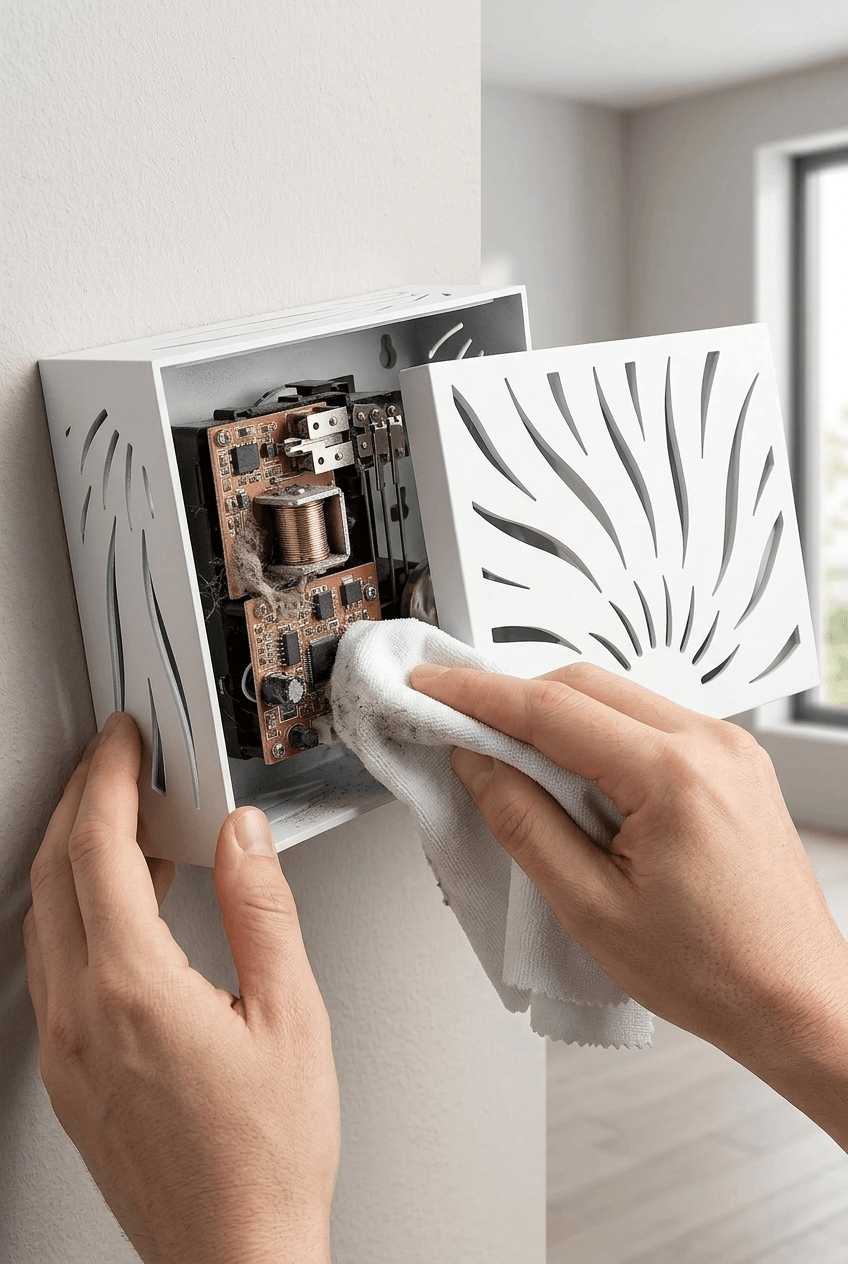
With the cover off, you have a clear view of the chime box interior. This is worth taking advantage of before you put everything back together.
Cleaning: Use a soft dry cloth to wipe dust and debris from inside the chime box. For harder-to-reach areas, a small soft-bristled brush or a gentle puff of canned air works well. Avoid using water, sprays, or liquid cleaners near any electrical components.
Inspection: Look carefully at the wires, terminals, and mechanical components inside. Common things to check for:
- Dust or debris buildup around the striker or chime bars
- Loose or disconnected wires at the terminals
- Signs of corrosion or rust on metal contacts
- Cracked, broken, or visibly worn internal components
Make a note of anything that looks unusual. If you spot loose wires that aren't obviously disconnected (i.e., the terminal screws are just slightly loose), you can gently tighten them with a small screwdriver. For anything more significant — corroded contacts, burned-looking components, or wiring you don't recognize — leave it for a professional to assess.
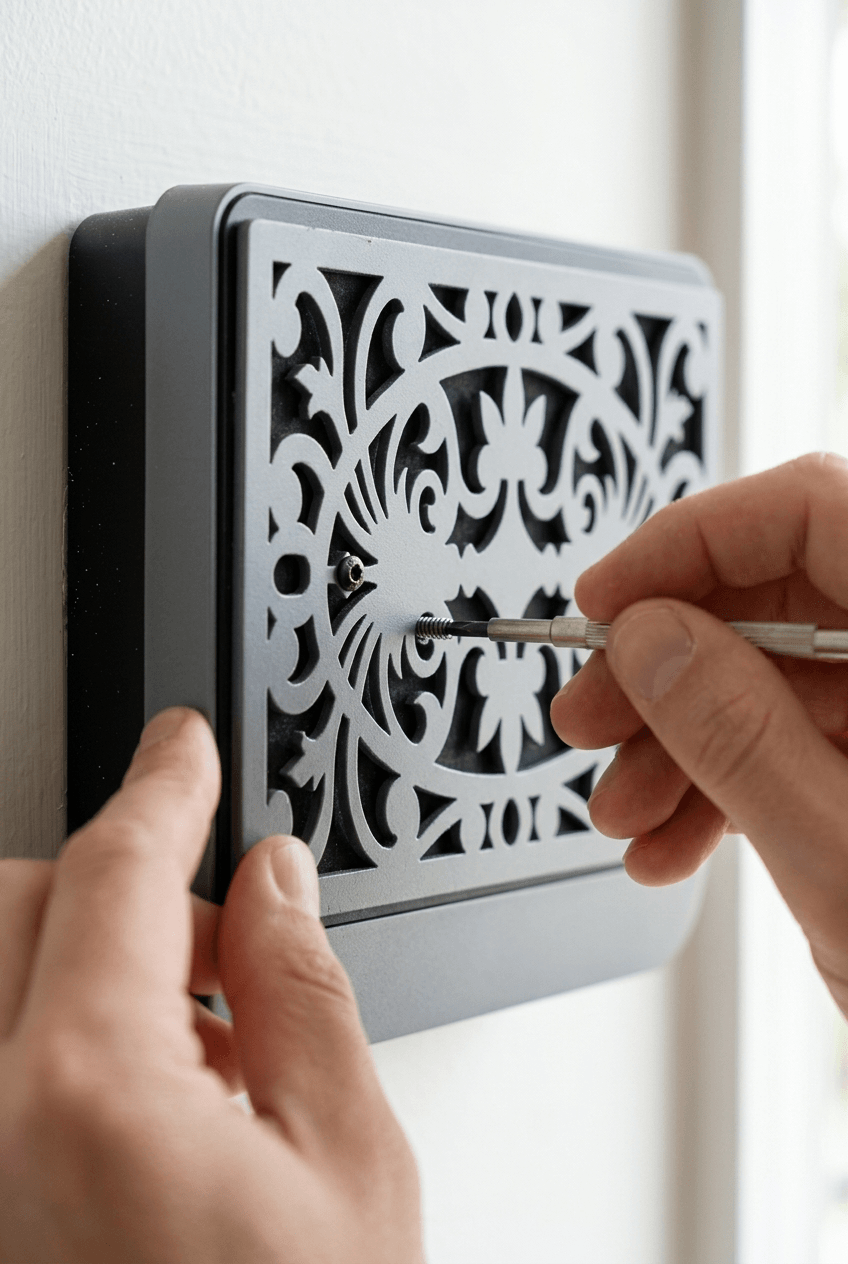
Reattaching the Cover Properly
Once you're satisfied with the cleaning and inspection, it's time to put the cover back. Reattachment is essentially the removal process in reverse — but done carefully to ensure the cover sits flush and secure.
- Screw-on covers: Align the cover with the mounting holes, hold it in place, and hand-tighten each screw before using the screwdriver. Tighten evenly — don't overtighten, which can crack the cover or strip the holes.
- Snap-on covers: Align all tabs with their corresponding slots, then press firmly and evenly until you hear or feel each tab click into place. Check all corners.
- Slide-on covers: Line up the cover with the channel or groove and slide it back in the same direction you removed it. It should seat fully with a firm push at the end.
Once the cover is secure, go back to the circuit breaker and restore power. Test the doorbell by pressing the button from outside. If the chime sounds normal, the job is complete. If something sounds off, or if the bell doesn't ring at all, move to the troubleshooting section below.
Troubleshooting Common Issues
If the doorbell doesn't work after reassembly, work through these checks before assuming something is seriously wrong:
- No sound at all: Check that the circuit breaker is fully back on. Confirm the cover is properly seated — a loose cover on a snap-on or slide-off unit can shift internal components.
- Inconsistent or buzzing sound: This often points to a loose wire. Open the cover again and check that all terminal connections are snug. Tighten any loose screws at the wire terminals gently.
- Cover won't sit flush: A piece of debris may be caught between the cover and the housing. Remove the cover, inspect the contact surfaces, and try again.
- Stuck cover during removal: If the cover feels truly immovable, don't force it. Check again for any hidden screws — some covers have a small screw concealed under a sticker or cap. Try gently warming the edges with a hairdryer on low to soften any dried adhesive or paint seal.
If none of these steps resolve the issue, consult the manufacturer's manual for your specific model. Many brands have model-specific quirks that aren't covered in general guides.
When to Call a Professional
This guide covers basic cover removal and light maintenance. There are situations where professional help is the right call — and recognizing them is part of doing the job safely.
Consider calling a licensed electrician if:
- You find burned, frayed, or visibly damaged wiring inside the chime box
- The doorbell still doesn't function correctly after troubleshooting
- The wiring inside is more complex than expected and you're not comfortable proceeding
- You smell burning or see signs of heat damage
- You're not confident that the power is fully off
There's no shame in stopping here. Doorbell systems connect to your home's electrical supply, and anything beyond basic maintenance is best left to someone with the right training and tools.
FAQ
What is a doorbell chime cover?
A doorbell chime cover is the outer housing that encloses the internal components of a wired doorbell chime unit — the striker, chime bars, wiring terminals, and transformer connections. It protects those components from dust and damage while giving the unit a finished appearance on the wall. Covers come in screw-on, snap-on, and slide-off styles depending on the manufacturer and model.
How do I remove a doorbell chime cover safely?
Start by turning off the power at your circuit breaker. Identify the cover type — screw-on, snap-on, or slide-off — and use the appropriate method. Screw-on covers need a screwdriver; snap-on covers release with gentle tab pressure; slide-off covers move in one direction along a groove. Never force any part of the cover. If it doesn't move freely, stop and reassess before applying more pressure.
Do I need to turn off power before removing it?
Yes — always. Even though most doorbell systems operate on low voltage (typically 16–24V), working on any electrical component without turning off the power first is unsafe. Turn off the corresponding circuit at your breaker panel before touching the chime cover or any internal components.
Can I clean inside the doorbell chime box?
Yes, and it's a good idea to do so when the cover is off. Use a soft dry cloth or a small brush to remove dust from the interior. Avoid liquids, sprays, or compressed air directed at wiring connections. Keeping the interior clean helps the mechanism function correctly and gives you an early look at any developing issues like loose wires or corrosion.
What if the cover is stuck?
First, double-check that all screws have been removed — some covers have a hidden screw under a small cap or sticker. If the cover has been painted over, score gently around the edges with a utility knife before attempting removal. For snap-on covers that feel stiff, a flathead screwdriver wrapped in cloth can help release stubborn tabs. Apply heat from a hairdryer on low setting to soften any dried adhesive if needed. Never force the cover — you risk cracking the housing or breaking internal clips.
Can I replace the doorbell chime cover myself?
Yes, in most cases. Doorbell chime replacement covers are widely available and designed to be swapped out without professional help. The key is finding a cover that's compatible with your specific chime model — check the model number on the existing unit before ordering. Installation follows the same process as reattachment: align, secure with screws or clips, and test the doorbell once power is restored.
Final Thoughts
Removing a doorbell chime cover is one of those small household tasks that sounds more complicated than it actually is. With the power off, the right screwdriver in hand, and a clear understanding of which cover type you're dealing with, the whole process takes just a few minutes.
Take the opportunity while the cover is off to give the interior a quick clean and look for anything that might need attention. Then reattach, restore power, and test. Regular maintenance like this — done every six months or so — keeps your system running reliably and helps you catch small issues before they become bigger ones.
When in doubt, or if anything inside the chime box looks damaged or unusual, don't hesitate to call a licensed electrician. Simple maintenance is well within DIY territory. Electrical repairs are not.