
How to Choose Decorative Vent Covers: A Homeowner's Guide for 2025
Posted by graues on 10.04.26
Decorative Vent Covers: How to Choose the Right Style, Material & Size
Most rooms have at least one thing in common: a vent cover that nobody really thought about. It came with the house, it does its job, and it quietly makes an otherwise polished space look a little... unfinished. Swapping out that builder-grade grille for something better is one of the smallest upgrades you can make — and one of the most noticeable. Decorative vent covers are available in a wide range of styles, materials, and finishes that can genuinely elevate a room without touching a single wall.

The right cover should do three things well: look beautiful, fit precisely, and allow air to flow freely. This guide walks you through every step, from understanding your options to measuring correctly to keeping your covers looking their best for years.

Key Takeaways
- Decorative vent covers can upgrade a room's look without any renovation work.
- Always measure the duct opening — not the old cover — before buying.
- Material matters: match your choice to the location, moisture level, and foot traffic.
- The design should allow air to move freely while complementing your decor.
- Regular cleaning and prompt replacement keep both your room and HVAC system performing well.
Why Decorative Vent Covers Matter in Interior Design
Vents show up everywhere: living room floors, hallway walls, bedroom ceilings, kitchen baseboards. In a finished, thoughtfully decorated space, a plain stamped-metal grille can look like an afterthought — because it usually is. It doesn't have to be.
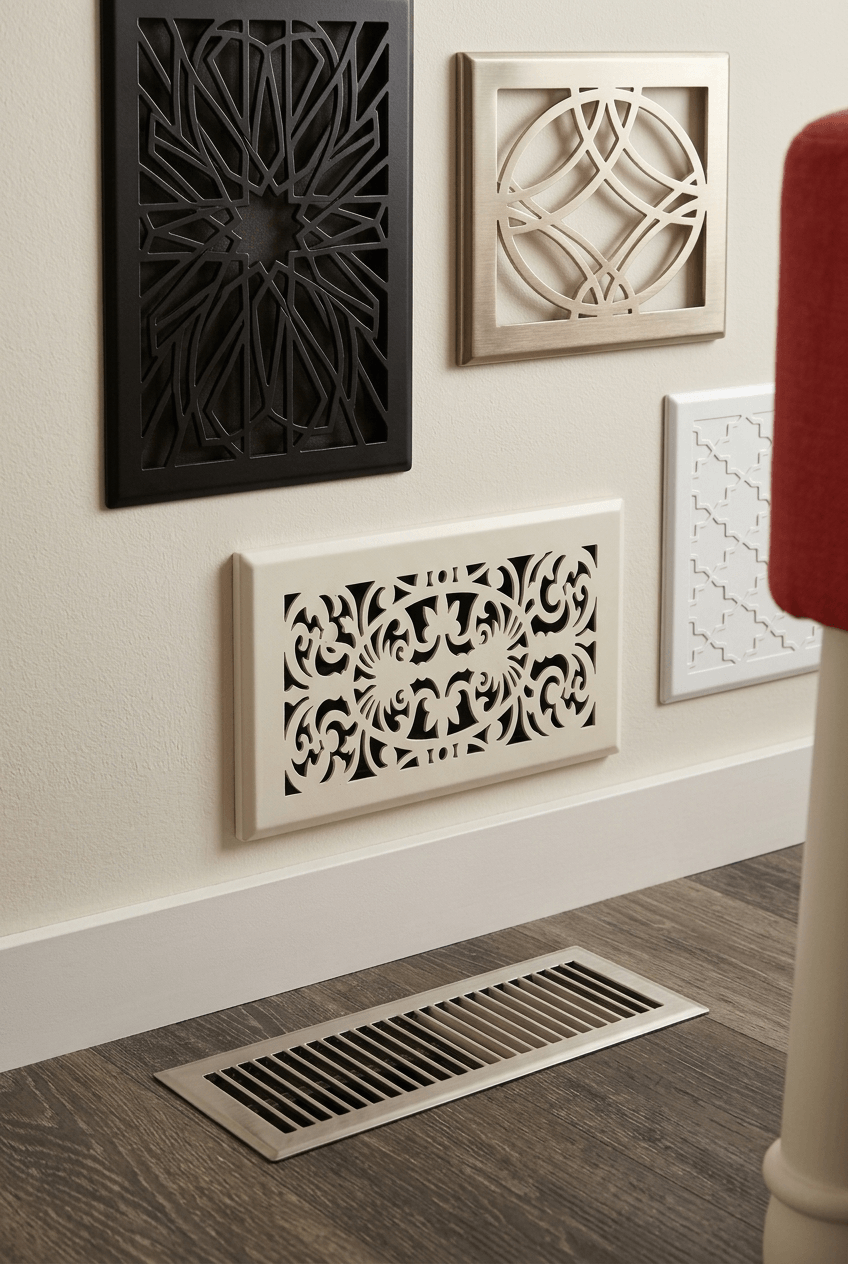
A quality decorative vent cover adds a layer of architectural interest that most people don't expect from something so small. In a room with hardwood floors, a well-matched floor vent cover can feel like part of the floor itself. On a white wall, a laser-cut metal grille can become a subtle focal point. On a ceiling, an ornate cast cover can echo the detailing of crown molding nearby.
The key is balance. Style should never come at the expense of function. A beautiful cover that blocks airflow defeats the purpose entirely. The goal is always to improve the look of the space while keeping the air moving exactly as it should.
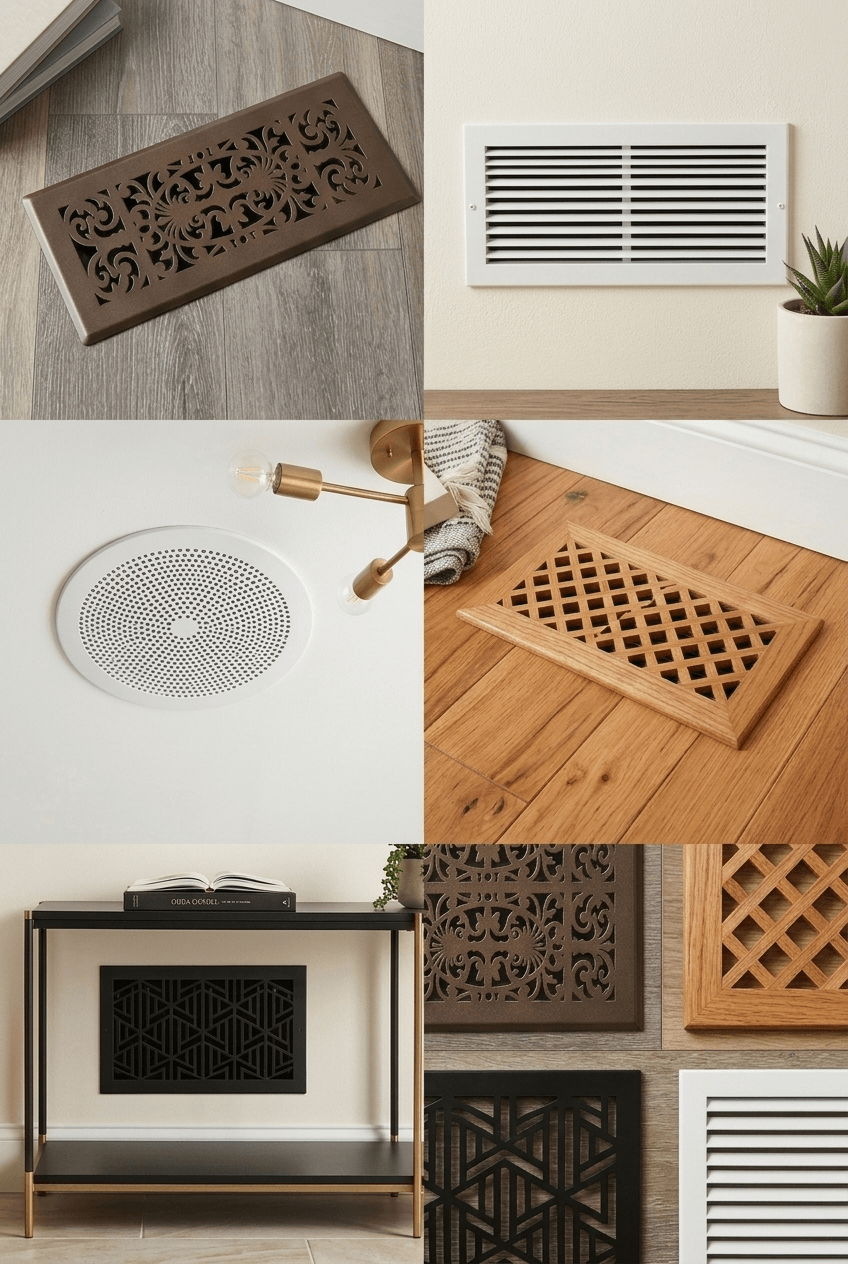
Types of Decorative Vent Covers
Understanding what's available makes the selection process much easier. Each type serves a slightly different purpose, and the best choice depends on where it's going, how much wear it will see, and how much moisture the area gets.
- Metal vent covers — The most popular and versatile category. Available in cast aluminum, steel, and cast iron, these covers suit nearly every room and style.
- Wood vent covers — Warm, natural, and available in many wood species and stain finishes. Best for walls and ceilings where they won't bear foot traffic.
- Fiberboard / high-density board covers — An affordable, paintable option that works well for custom or color-matched designs. Good for walls and toe-kick installations.
- Modern plastic covers — Lightweight and easy to maintain. Found in bathrooms and utility areas. Not as visually refined as metal or wood, but practical where weight and cost matter.
- Decorative floor vent covers — Built to handle foot traffic. These need stronger, heavier materials and sit flush with the floor surface.
- Wall and ceiling vent covers — Typically lighter in construction since they don't bear weight. Design options here are the widest.
- Custom vent covers — Made to a specific size, pattern, or finish. Useful for unusual duct openings or rooms with very specific design requirements.
Choosing the Right Material
Material choice is one of the most practical decisions in this process. The wrong material in the wrong location will look bad quickly — and may not hold up at all.
Metal vent covers are the most durable option and handle high-traffic areas well. Cast aluminum is lightweight while still being tough, and it resists rust — making it an excellent choice for moisture-prone spaces like bathrooms, kitchens, and laundry rooms. Cast iron has a heavier, more substantial feel and suits traditional or vintage-inspired interiors beautifully. Steel covers often include adjustable dampers and come in a wide range of finishes.
Wood vent covers add natural texture and warmth that no metal cover can fully replicate. They look exceptional on walls and ceilings, especially in rooms with exposed wood beams, paneling, or hardwood floors. Most wood covers are not recommended for floor use where foot traffic is heavy.
Fiberboard options (sometimes called high-density board or HDM) are ideal when you want a paintable surface that can be matched precisely to your wall color. They're budget-friendly and accept detailed laser-cut or routed patterns well.
Plastic covers are the most affordable and the easiest to clean. They work well in utility spaces, bathrooms, and rental properties where appearance is secondary to practicality.
One general rule: floor vents always need stronger materials than wall or ceiling covers. A cover that has to support weight — even occasional foot traffic — should be cast metal, not wood or plastic.
| Material | Best For | Style Feel | What to Check Before Buying |
|---|---|---|---|
| Cast Aluminum | High-traffic, moisture-prone areas | Modern to classic | Weight rating for floor use |
| Cast Iron | Traditional or vintage rooms | Heritage, ornate | Floor load rating; weight |
| Steel | General residential use | Clean, utilitarian | Rust-resistance coating |
| Wood | Walls, ceilings, cabinetry | Warm, natural, artisan | Not for floor vents with foot traffic |
| Fiberboard (HDM) | Painted walls, toe kicks | Custom, seamless | Moisture resistance; not for wet areas |
| Plastic | Bathrooms, utility rooms | Practical, minimal | Longevity in high-UV or heat areas |
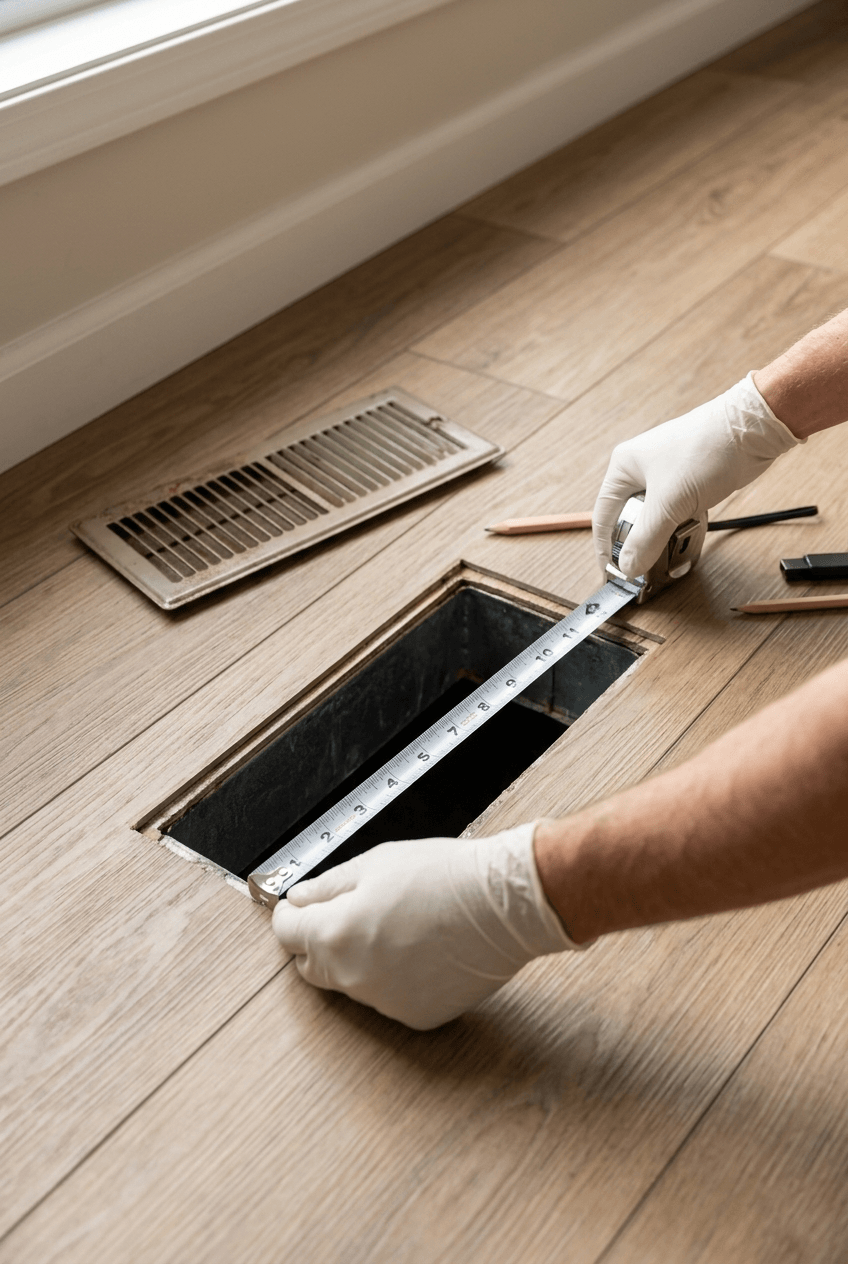
Measuring and Sizing Your Vents
This is where many people make a costly mistake: they measure the old cover rather than the actual duct opening. Different manufacturers use different frame sizes, so the old cover's dimensions won't reliably tell you what size to order.
Here's a reliable process:
- Remove the existing cover. Use a screwdriver, and if the cover has been painted over, score around the edges carefully with a utility knife to prevent paint from peeling off the wall or floor.
- Measure the duct opening. Measure the width first, then the height (or length for floor vents). These are the numbers you need.
- Round carefully. Some manufacturers recommend rounding to the nearest half-inch. Check the specific brand's guidance before doing this.
- Confirm the frame overlap. Most covers have a frame that extends beyond the duct opening — often about an inch on each side. Confirm the overall frame dimensions before ordering so the cover sits correctly over the opening.
- Check the depth and clearance. Some floor registers have damper mechanisms that need clearance inside the duct. Measure the depth if the space is tight.
- Note the mounting method. Wall and ceiling covers typically use screws through pre-drilled holes. Check the screw placement on the new cover matches your wall material and stud locations.
Standard residential vent sizes range from small (2.25" x 10") to large (6" x 30"), with floor registers often using a 4" x 10" duct opening. Floor, wall, and ceiling vents may use different sizing conventions and mounting systems, so it's worth confirming with the manufacturer before ordering anything non-standard or custom.
Airflow, Comfort, and HVAC Performance
A decorative air vent cover should never compromise the airflow your HVAC system depends on. The cut-outs, grille openings, or pattern slots in your cover need to be open enough to let air pass through freely — not just look open.
Common airflow mistakes include placing rugs over floor vents, pushing furniture against wall vents, or hanging curtains that fall directly in front of a register. Even a beautiful cover can become a problem if it's partially blocked by a sofa leg or a heavy floor mat.
It's also worth keeping the duct itself clean and unobstructed. The U.S. Department of Energy provides helpful air conditioner maintenance guidance on keeping vents clear and supporting proper system performance — worth reading if you're refreshing multiple vents throughout a home.
When evaluating a cover, look at the open area of the grille. Ornate patterns with very small openings may look stunning but restrict airflow more than a simpler design. For bedrooms and living areas where comfort matters most, prioritize covers with generous open area.
Style and Design Selection
Once you know the material and size, the fun part begins. Vent cover designs have come a long way from the plain stamped grilles that came standard in most homes.
Modern and geometric styles favor clean lines, simple repeating patterns, and matte or brushed finishes. These work especially well in minimalist, Scandinavian, or industrial interiors. Flush-mount options that sit perfectly level with the wall or floor surface are popular in contemporary spaces.
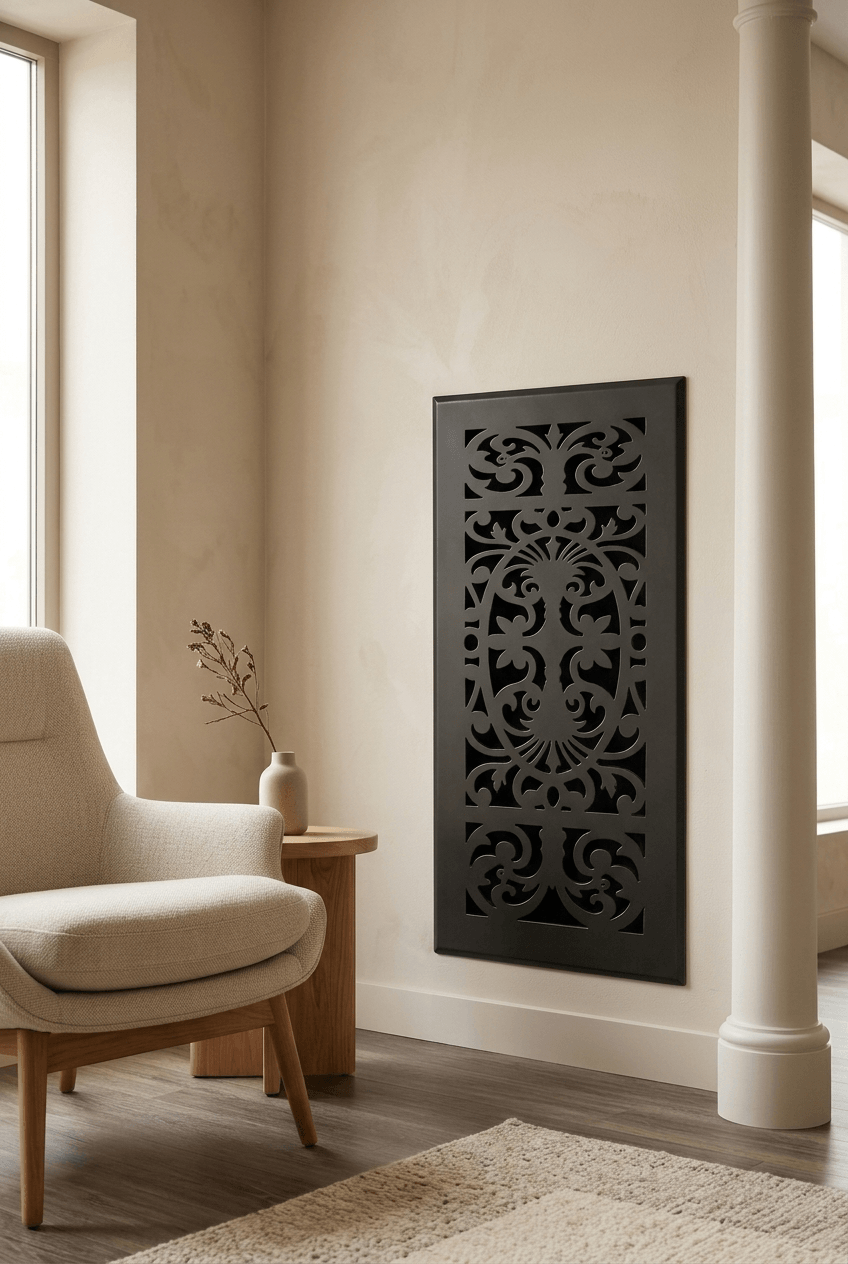
Traditional and ornate designs bring warmth through intricate grille work, scrollwork, and antique-style finishes. Victorian-inspired patterns, arts and crafts motifs, and detailed casting suit older homes, formal dining rooms, and spaces with decorative trim.
Moroccan, Arabic, and circular patterns add a layer of visual character that goes well beyond pure function. These laser-cut designs — often available in metal or fiberboard — can make a single vent cover feel like a piece of architectural detail rather than something to overlook.
Custom laser-etched covers allow you to bring in your own pattern or choose from a manufacturer's design library. This option is ideal for spaces with very specific design requirements or for someone who simply wants something genuinely unique.
Whatever the style, the design should feel like it belongs in the room — not like an accessory that was added as an afterthought.
Color Matching and Finish Tips
The finish of a vent cover plays a bigger role than most people expect. The wrong finish — even on a well-designed cover — can make it stand out in the wrong way.
The easiest approach for floor vents is to match the flooring tone as closely as possible. A warm oak floor pairs well with a brushed bronze or oil-rubbed bronze finish. A white or pale grey floor often looks best with a white or light brushed nickel cover. For a white decorative floor vent cover, this approach works especially well in kitchens and tiled spaces where light, clean tones dominate.
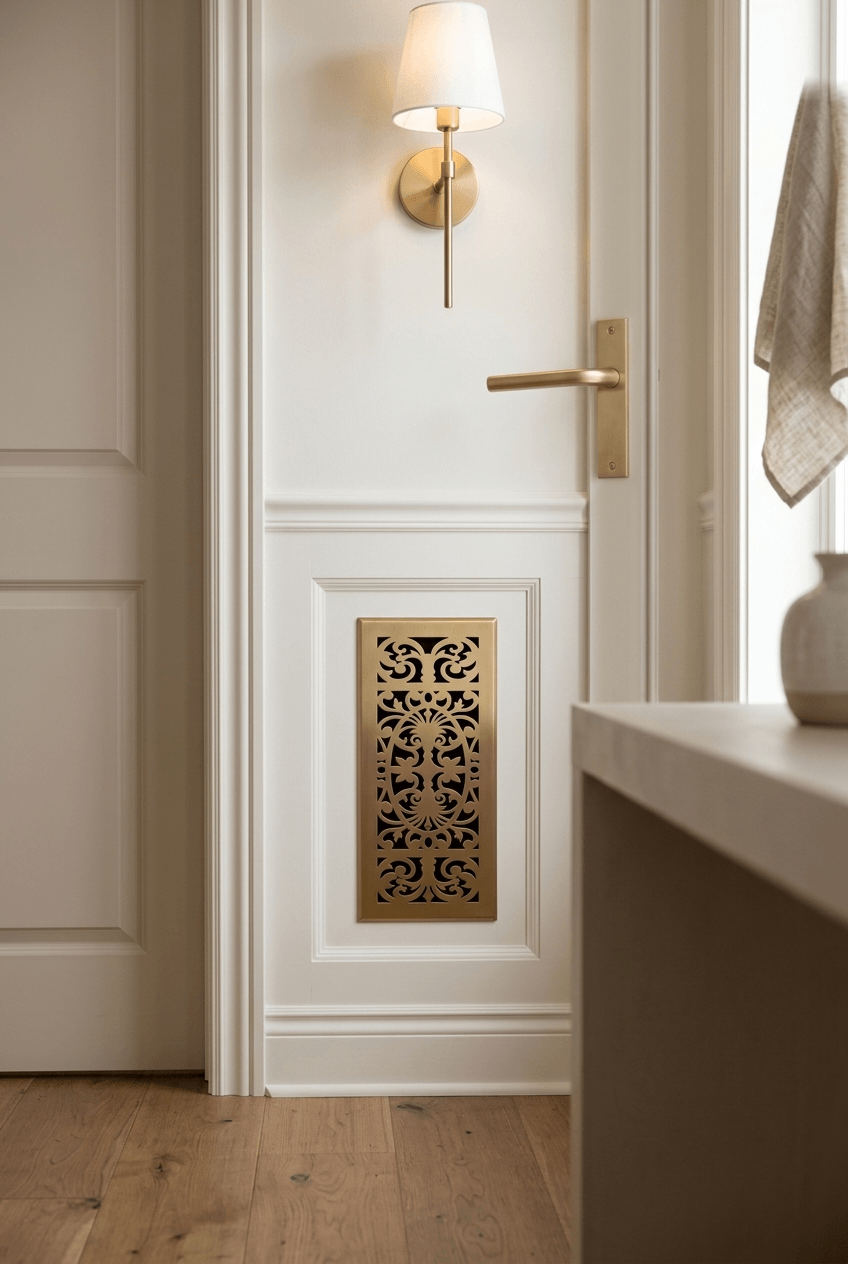
For wall vents, matching to the wall color or the trim is generally the safest choice. White covers disappear neatly against white walls. Black covers add a graphic punch in modern or monochromatic rooms. Matte black finishes, brushed brass, and brushed steel are all popular right now and work well alongside contemporary door hardware and lighting fixtures.
If you want the cover to function as a subtle design accent rather than disappear, try matching it to the metal tone of nearby hardware — cabinet pulls, faucets, or light fixture finishes. This creates a cohesive layer of detail that feels deliberate rather than accidental.
Many manufacturers offer paintable fiberboard covers that can be primed and painted to match any wall color exactly. Premium powder-coat finishes allow even more precise color matching for metal covers.

DIY Installation Basics
Most standard vent cover replacements are simple DIY projects that require no special skills or tools. Here's a straightforward approach:
- Remove the old cover. Unscrew it or lift it free from the duct opening. For painted-over covers, score the edges first to avoid pulling paint from the wall or ceiling.
- Clean around the opening. Wipe away dust, old paint, and debris before fitting the new cover. A clean surface helps the new cover sit flush and look neat.
- Align the new cover. Place it over the duct opening and confirm it sits flat with even overlap on all sides.
- Secure it correctly. Floor registers often drop into the duct opening and need no fasteners. Wall and ceiling covers typically need screws through pre-drilled holes. Use the correct screw size — don't force anything.
- Confirm it sits flat and secure. A cover that rocks, gaps, or rattles will look and feel wrong. Take a moment to make sure it's seated properly.
- Check airflow. Run your hand near the cover when the system is on to confirm air is moving freely through the opening.
For wall and ceiling covers, secure mounting is especially important — a falling ceiling register is a safety issue, not just an aesthetic one. If the duct opening is damaged, the surrounding surface is uneven, or the cover is unusually heavy, it's worth getting a professional to handle the installation.
Cleaning and Maintenance Tips
Vent covers collect dust faster than most surfaces in the room because air is constantly moving through them. A small amount of regular attention keeps them looking sharp and performing well.
- Monthly: Dust with a soft dry cloth or a vacuum brush attachment. This prevents buildup from becoming embedded in the grille pattern.
- Every 6 months: Remove the cover and wash it with mild soap and warm water. Rinse thoroughly.
- Dry completely before reinstalling. Putting a damp cover back on a duct encourages dust to cling and can cause rust in metal covers over time.
- Metal covers — Most can handle gentle soap and water. Avoid abrasive cleaners that can scratch the finish.
- Wood covers — Wipe with a slightly damp cloth; avoid soaking. Use a wood-safe cleaner if needed.
- Fiberboard covers — Keep these dry. Moisture can cause swelling or paint to lift.
- Check grille openings — Make sure no buildup is restricting airflow. A toothbrush works well for intricate patterns.
- Inspect regularly for rust spots, loose screws, cracked frames, or stuck louvers.
- Replace when needed. A clean, well-maintained cover protects the duct and helps your system run efficiently. For broader heating and cooling efficiency tips, the ENERGY STAR program has practical guidance on keeping your whole system in good shape.
When to Replace Old Vent Covers
Sometimes cleaning isn't enough. Here are clear signs it's time to move on:
- Rust or corrosion that won't clean off
- Broken, bent, or stuck louvers that restrict airflow
- A cracked or bent frame that no longer sits flat
- Finish damage that makes the cover look dated or worn
- Heavy dust buildup inside the grille that can't be fully removed
- A cover that was never the right fit — gaps around the edges, rattling, or visible misalignment
- Upgrading the room's decor and wanting the small details to match the new direction
Replacing vent covers during a room refresh is one of the most cost-effective finishing touches available. It takes minutes and the visual difference can be significant.
Common Mistakes to Avoid
- Buying without measuring first. The single most common and most avoidable mistake.
- Measuring the old cover instead of the duct opening. These numbers are rarely the same.
- Choosing style over airflow. A beautiful cover with tiny openings can restrict your HVAC system.
- Using lightweight material on floor vents. Wood and fiberboard are not designed for regular foot traffic.
- Ignoring moisture exposure. Wood and fiberboard covers in bathrooms or laundry rooms will deteriorate quickly.
- Assuming one cover type works everywhere. Floor, wall, and ceiling vents use different mounting systems and have different structural needs.
- Clashing finishes. A warm bronze cover on a cool-toned, all-white room rarely looks intentional.
- Blocking vents with rugs, furniture, or curtains. Even the best cover can't do its job if the opening is obstructed.
- Skipping maintenance. Dusty, damaged covers affect both appearance and airflow.
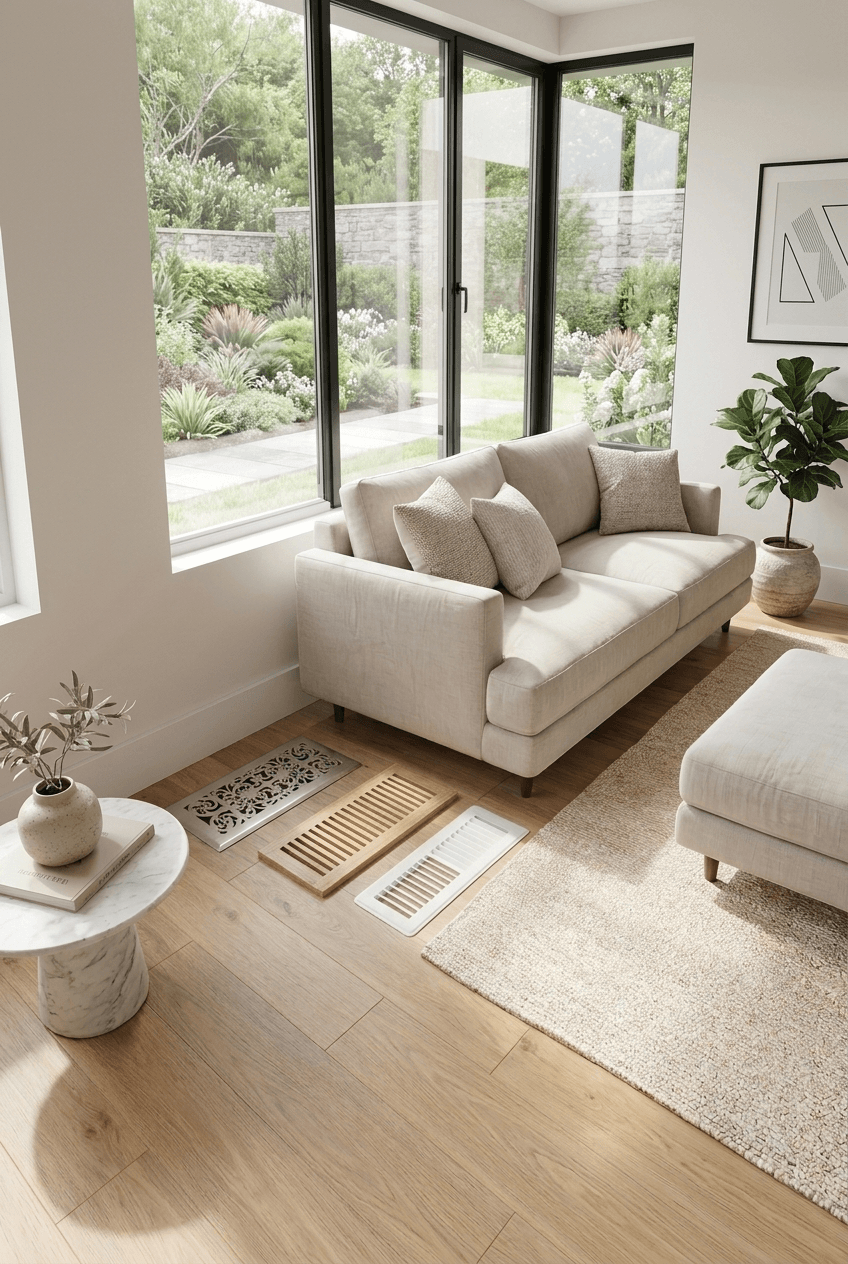
Decorative Vent Cover Ideas by Room
Different rooms call for different approaches. Here are some practical starting points:
- Living room — A brushed brass or oil-rubbed bronze floor cover adds warmth and looks deliberate alongside hardwood floors and layered rugs.
- Hallway — Floor vents in hallways see more foot traffic than most. Cast aluminum or steel with a durable powder-coat finish is the sensible choice here.
- Bedroom — Prioritize quiet and airflow. A simple geometric pattern in a finish that blends with the trim keeps the room feeling restful.
- Kitchen — White or stainless finishes tend to work best. A decorative wall vent cover in brushed nickel or matte white can blend cleanly into a tiled backsplash or painted wall.
- Bathroom or laundry area — Rust-resistant aluminum is essential here. Avoid wood and fiberboard in humid spaces.
- Farmhouse entryway — Cast iron or wrought-look metal covers with an antique or oil-rubbed bronze finish suit the warm, textural aesthetic of farmhouse interiors.
- Minimalist apartment — Flush-mount covers in matte black or concrete grey disappear cleanly into modern interiors without adding visual noise.
- Traditional home — Ornate cast covers with Victorian or arts-and-crafts detailing look at home alongside crown molding, paneled walls, and antique finishes.
Practical Buying Checklist
- Measure the duct opening (width × height), not the old cover
- Confirm the overall outside frame size will overlap the opening correctly
- Check the duct depth and clearance if needed
- Choose a material suited to the location — moisture, traffic, and structural load
- Confirm the grille pattern allows adequate airflow
- Match the finish to the surrounding decor — floor tone, wall color, or nearby hardware
- Confirm it is rated for floor, wall, or ceiling use as needed
- Choose stronger materials for floor vents in high-traffic areas
- Consider how easy it will be to clean
- If the opening is non-standard, look at custom sizing options before settling for a poor fit
FAQ
What are decorative vent covers used for?
Decorative vent covers replace standard builder-grade grilles on floor, wall, and ceiling HVAC vents. They serve the same functional purpose — allowing conditioned air to flow in and out of a room — while also improving the appearance of the space. A quality decorative vent cover can add a polished, finished look to any room without requiring renovation work.
How do I measure for a decorative vent cover?
Remove the existing cover and measure the actual duct opening — width first, then height. Do not measure the old cover itself, as different manufacturers use different frame sizes. Most covers have a frame that extends about an inch beyond the opening on each side. Confirm the overall frame dimensions with the manufacturer before ordering.
What material is best for vent covers?
It depends on where the cover is going. Cast aluminum is the most versatile — durable, rust-resistant, and available in many styles. Wood covers add warmth and character but are best suited for walls and ceilings, not high-traffic floors. Fiberboard is a good paintable option for walls. Plastic works well in bathrooms and utility spaces where cost and weight matter more than aesthetics.
Will decorative vent covers reduce airflow?
A well-designed cover should not meaningfully reduce airflow. The key is to check the open area of the grille pattern — a cover with very small or tightly spaced cut-outs can restrict air more than one with generous openings. Avoid covers that are blocked by furniture, rugs, or curtains, which reduces airflow regardless of the cover's design.
Should vent covers match the wall, floor, or trim?
There's no single right answer — it depends on the effect you want. For floor vents, matching the floor tone tends to look cleanest. For wall vents, matching the wall color or the trim creates a seamless effect. If you want the cover to function as a subtle accent, matching it to nearby metal hardware (light fixtures, door handles, cabinet pulls) can look very intentional and cohesive.
Can I install decorative vent covers myself?
Yes, in most cases. Standard floor registers drop into the duct opening with no fasteners. Wall and ceiling covers typically attach with a few screws through pre-drilled holes. The process is straightforward for most residential vents. If the opening is damaged, the surface is uneven, or the cover is unusually heavy, a professional installer can handle it quickly and safely.
Final Thoughts
The details that get overlooked in a finished room are often the ones that quietly undermine it. A worn, mismatched, or builder-basic vent cover is one of those details — small enough to ignore, but noticeable once you start paying attention.
Upgrading to decorative vent covers is one of the most accessible ways to bring a room's finishing touches up to the standard of everything else you've put into it. The investment is modest, the installation is simple, and the impact is real.
Take a few minutes to measure your duct openings, think about the material and finish that suits each room, and choose covers that genuinely complement the spaces they're in. It's a small change — but that's exactly what makes it such a satisfying one.